Last Updated on October 12, 2026 by Rosslyn Tebbutt
A cohesive remodel does not require every surface to match.
It requires each decision—from the flooring and cabinetry to the lighting and ceiling—to support the same visual idea.
The simplest way to achieve that is to establish a clear hierarchy, repeat a small set of colours and materials, and review the room as a three-dimensional composition before construction begins.

Key Takeaways
- Begin with the room’s fixed elements and one concise design concept, not a shopping list.
- Build a palette with controlled repetition: a dominant neutral, a supporting material and one or two accents.
- Treat the ceiling as part of the architecture rather than an afterthought.
- Use samples, elevations and a physical or digital mood board to test relationships in real light.
- Coordinate dimensions and installation details early so that good design survives construction.
Start With a One-Sentence Design Direction
Before choosing tile or paint, describe the intended room in one sentence. “A warm, contemporary kitchen with quiet oak, creamy stone and tailored black details” is useful.
“Modern farmhouse” alone is not; it leaves too much room for conflicting interpretations.
That sentence becomes a filter.
A dramatic veined worktop may be beautiful, but does it belong in a deliberately quiet room? Would a highly rustic beam compete with streamlined cabinetry?
The goal is not to remove character. It is to make every element feel as if it was chosen for the same home.
A strong direction should cover three things:
- Mood: calm, energetic, formal, relaxed or collected.
- Visual language: linear, curved, minimal, crafted or traditional.
- Material character: pale and matte, dark and polished, earthy and textured, or another clear combination.
This brief is particularly valuable when several people are involved.
Homeowners, designers, remodelers and specialist installers can make better decisions when they are responding to the same idea.

Build the Room From the Fixed Elements Out
The most expensive or difficult-to-change components deserve attention first.
Flooring, built-ins, cabinetry, major stone surfaces and architectural changes generally have a longer life than cushions, lamps or paint.
Identify the visual anchors
Choose one or two anchors rather than asking every feature to lead. In a kitchen, the anchor might be a stone island and a beam rhythm overhead.
In a living room, it could be a fireplace wall and wide-plank flooring. Supporting elements should reinforce those anchors rather than compete with them.
Confirm the layout and sightlines first, then coordinate floor, joinery, architectural features, lighting and finishes before adding furniture.
This reduces the risk of designing the lower half beautifully only to find that the ceiling has no visual connection to it.

Create a Controlled Palette, Not a Matching Set
The strongest rooms usually combine similarity with contrast. Too much similarity looks generic; too much contrast looks accidental.
Start with a simple ratio rather than a rigid rule.
Let one family of colours occupy most of the visual field, allow a secondary material to establish warmth or structure, and reserve the smallest share for contrast.
Actual proportions will vary with the room, but thinking in layers helps prevent a favourite accent from taking over.

Compare undertones in the same light
White, grey, beige and timber all have undertones. A creamy wall can make a cool grey floor appear blue.
A red-toned timber can fight with a pink-beige stone. Place samples together, vertically and horizontally, in the room where they will be used. Review them in morning daylight, evening light and under the proposed lamps.
Small samples can also be deceptive. Paint a generous test patch. Lay several flooring boards together. If possible, obtain a representative stone or tile sample that shows its variation, not just its quietest corner.
Repeat shape as well as colour
Cohesion can come from geometry.
A room with arched openings might repeat soft curves in pendants and chair backs.
A linear ceiling treatment can relate to plank flooring, cabinet reveals or a rectangular island. Repeating a form two or three times is often subtler than repeating an identical finish.

Design the Ceiling as the Room’s Fifth Surface
Ceilings influence proportion, rhythm and perceived warmth. Leaving them until the end can lead to awkward light placement, underscaled details or an architectural feature that feels pasted on.
Decorative beams can help organise an open plan, emphasise a long axis or make a tall room feel more intimate.
Coffered patterns can introduce formality and rhythm. A simple colour change may be enough in a low or busy room.
The right choice depends on ceiling height, structural conditions, room size and the amount of visual activity below.
US specialist Elite Ceiling Designs describes custom decorative ceiling and wall solutions that include lightweight faux-wood beams and architectural elements, as well as design, fabrication and installation services in its stated US markets.
That kind of specialist input can be useful early, when proportions, junctions and lighting locations are still flexible.
Coordinate the ceiling with what sits below it
A ceiling grid should not ignore the kitchen island, dining table or furniture plan. Beams that nearly align with cabinetry can look like mistakes.
Pendants centred on a worktop may conflict with a coffered layout unless both are designed together.
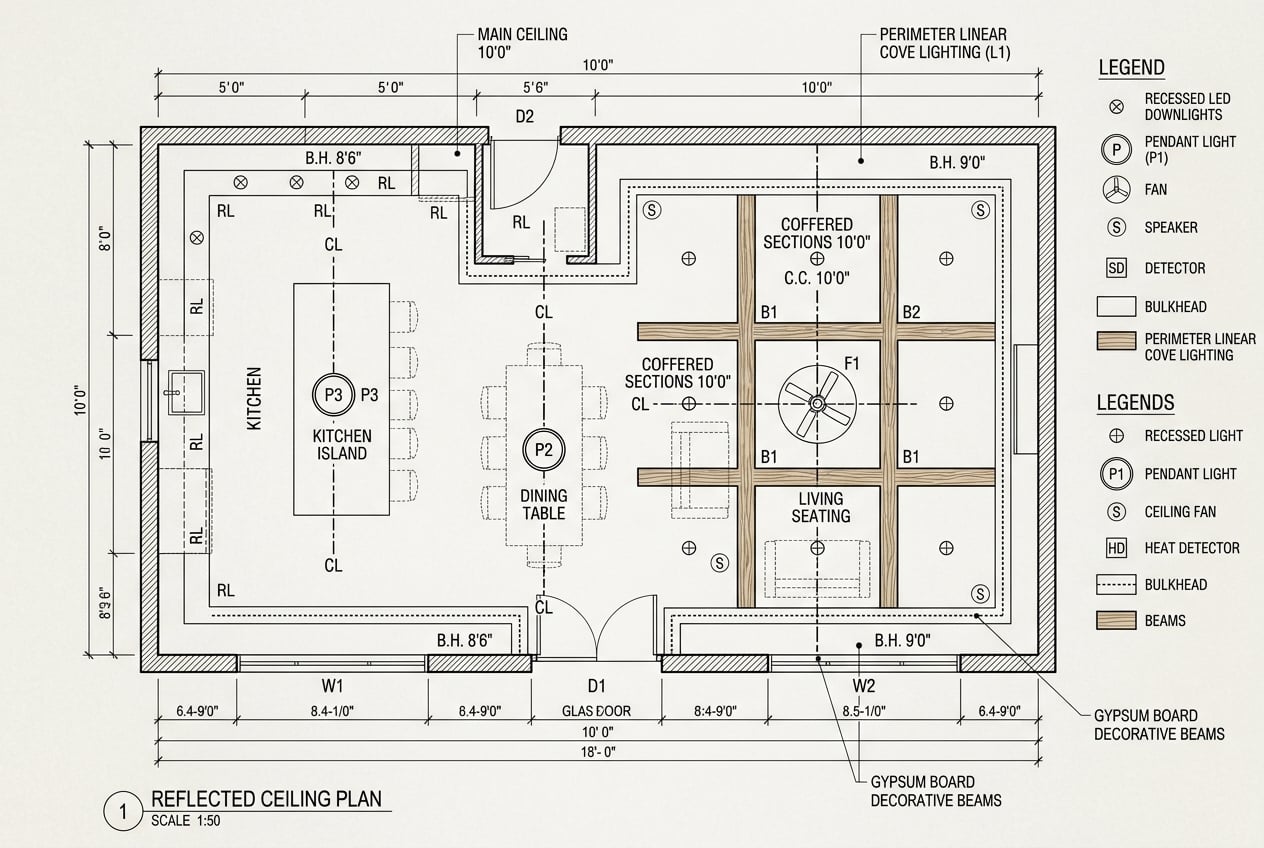
Draw a reflected ceiling plan showing:
- beams, coffers, bulkheads and changes in level;
- recessed lights, pendants, fans, speakers and detectors;
- the centre lines of islands, tables and focal furniture;
- window and door openings that influence symmetry.
This is where millimetres matter more than mood boards. A coherent concept still needs coordinated dimensions.
Connect Floor, Walls and Ceiling With Visual Lines
Good rooms guide the eye. Flooring direction, cabinet runs, ceiling beams and lighting can all reinforce a primary sightline.
When too many lines point in unrelated directions, the room feels restless.
Use the entrance as a test. What is the first focal point? Where does the eye move next? A floor laid towards a garden view may strengthen the room’s depth.
Beams running across that same path may intentionally slow the space and create zones—but the effect should be deliberate.
Remodelling professionals also bring practical constraints into this visual plan.
Boise-based Iron Crest Remodel presents interior and whole-home remodelling among its Idaho services and describes a process moving from consultation and design through construction and final walkthrough.
Whatever contractor a homeowner chooses, the useful lesson is to connect design selections with scope, sequencing and accountable site coordination.
Use Contrast to Clarify the Hierarchy
Cohesion does not mean avoiding bold choices. It means deciding where contrast belongs.
If the ceiling is highly detailed, keep the floor pattern quieter. If the stone has dramatic movement, allow nearby joinery to act as a calm frame.
If the room contains several timber surfaces, vary their texture or value while keeping undertones compatible.
Matte and gloss versions of a colour can create depth without adding another hue.
One effective technique is to nominate a “hero, support and background”:
- Hero: the feature intended to attract attention.
- Support: a material or form that strengthens the hero.
- Background: visually quiet surfaces that give both room to work.
When two features both demand hero status, separate them by sightline or reduce one’s contrast.
Plan Practical Performance Alongside Appearance
A beautiful remodel must also cope with cleaning, movement, moisture, heat and daily wear. Ask how every finish will age, not just how it photographs on installation day.
For indoor projects, product emissions and construction dust deserve attention.
The US Environmental Protection Agency recommends isolating work areas, providing exhaust ventilation and continuing strong ventilation after activities that can release pollutants.
Its remodelling guidance also advises considering low-emitting paints, sealants and finishes where suitable and following manufacturers’ directions.
Make the Mood Board Work Harder
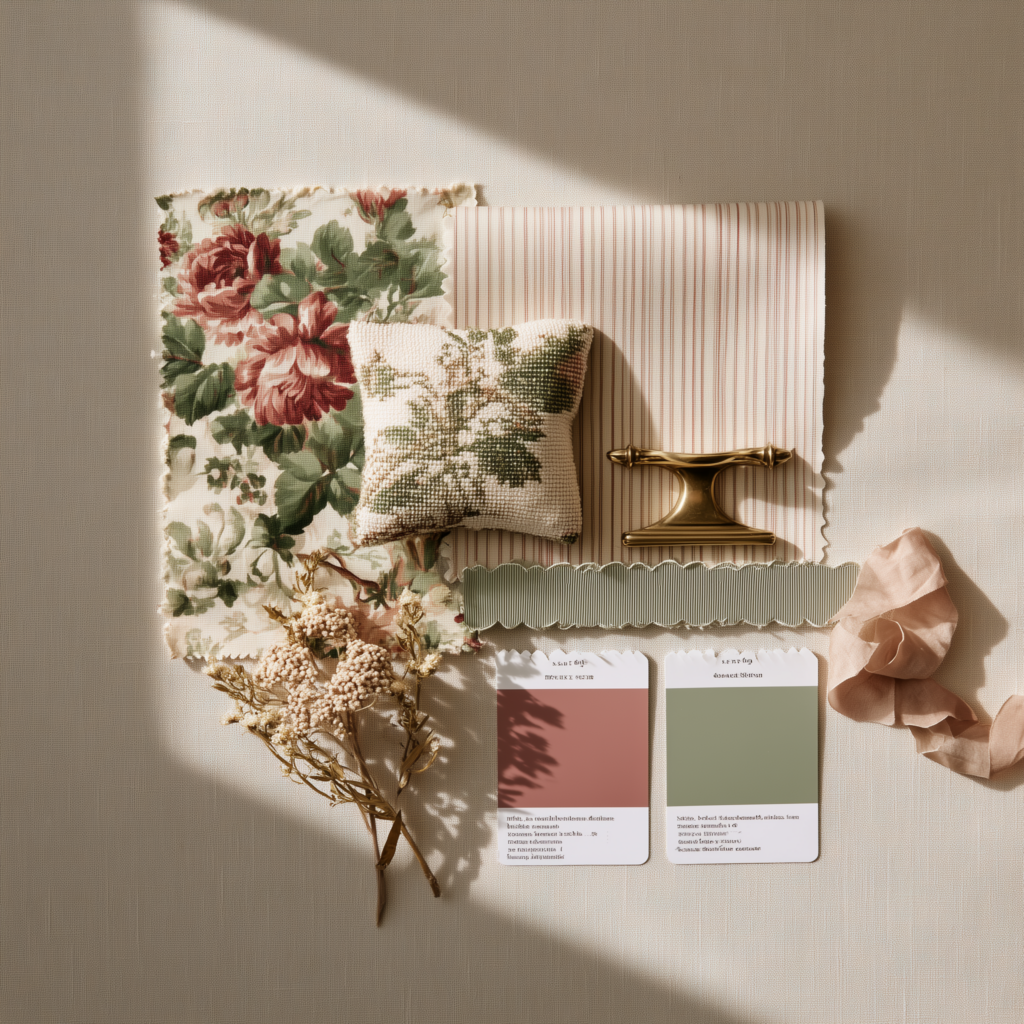
A publication-ready mood board is not only an inspiration collage. It should become a decision tool.
Include the actual floor, wall and textile samples where possible. Add a plan or elevation, a photograph of the existing room, the proposed lighting temperature and a few reference images that demonstrate the intended proportions.
Label what each image contributes: colour, texture, joinery detail, beam spacing or atmosphere.

A Pre-Construction Cohesion Check
Before orders are placed, review the room at three scales.
Whole-room scale
Does the room have a clear focal point and a readable path? Do the floor, walls and ceiling support one design sentence?
Junction scale
Resolve skirting against cabinetry, tile edges, beam ends, curtain pockets, thresholds and changes in ceiling level. These small transitions often determine whether a remodel feels resolved.
Sample scale
Approve colours, sheen and texture using physical samples under the intended light. Record product names, finish codes and installation directions in one schedule.
Finally, ask someone unfamiliar with the project to look at the board and drawings. If they can describe the intended mood and focal point quickly, the design hierarchy is probably working.
Frequently Asked Questions
Should the floor and ceiling timber match exactly?
Usually not. Exact matching can look overly coordinated and is difficult across different materials. Aim for compatible undertones and a clear relationship in warmth, then allow some variation in value or texture.
Can a low ceiling still have architectural detail?
Yes, but scale and projection matter. Shallow trim, restrained coffering, painted details or carefully proportioned lightweight elements may add interest without making the room feel crowded. Confirm clearances and lighting positions before committing.
When should ceiling specialists and remodelers become involved?
Ideally during design development, before electrical plans, final dimensions and orders are fixed. Early coordination helps align decorative elements with framing, lighting, cabinetry and installation sequencing.
Source Notes
- US Environmental Protection Agency, Best Practices for Indoor Air Quality When Remodeling Your Home.
- Client service descriptions and locations were checked against the two official business websites linked naturally above. The businesses are independent examples and are not presented as affiliated.